Introduction
Why Leather Gear Requires Special Care
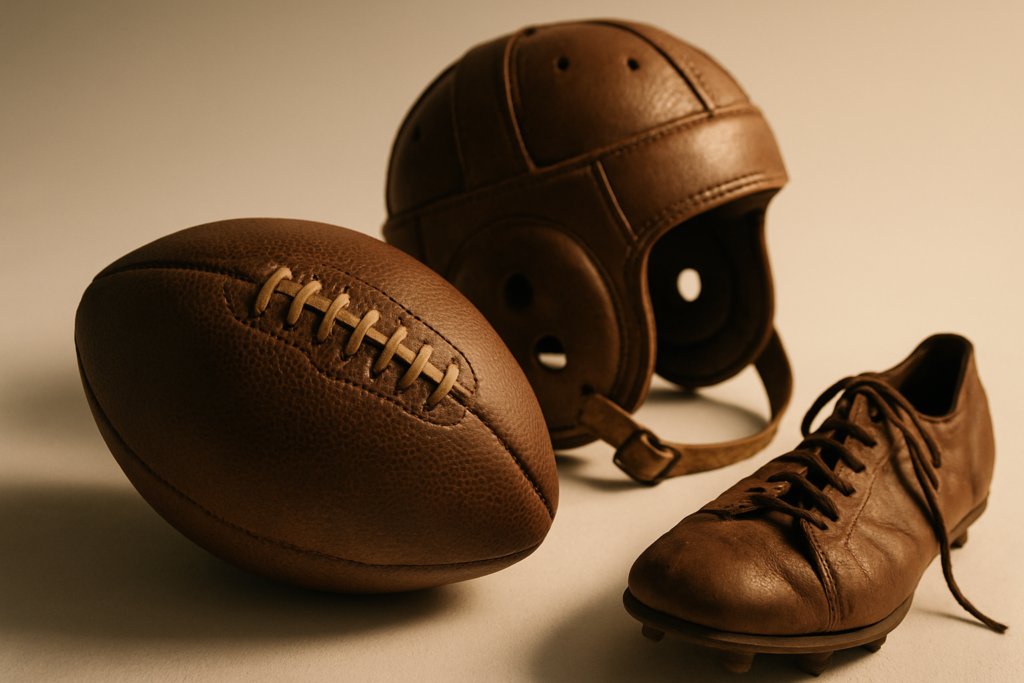
Leather football gear is built for toughness—but it’s not invincible. Unlike synthetic materials, leather is a natural material that can crack, dry out, or degrade without proper care. Its porous nature means it can absorb sweat, dirt, and moisture, making it more vulnerable to wear if not maintained correctly.
Cleaning leather gear isn’t a one-size-fits-all process. It requires attention to detail and the right tools to preserve the material’s flexibility and structural integrity over time.
Key reasons leather gear needs special attention:
Leather can dry and crack if not conditioned regularly
Harsh chemicals or rough scrubbing can permanently damage the surface
Retaining the natural oils and finish is essential for comfort and durability
Why Maintenance Affects Performance and Longevity
Proper maintenance isn’t just about appearances—it directly impacts how your gear performs. Well-kept leather remains flexible, which helps with comfort, mobility, and fit during practice and games. Damaged or neglected gear can stiffen up, lose protective qualities, or even become unsafe.
Benefits of regular maintenance:
Keeps gear comfortable and form-fitting
Enhances grip and usability on the field
Prolongs the life of expensive equipment
Prevents odor, bacteria, and mold
In short, a clean, conditioned piece of leather gear gives players a competitive edge—and saves money in the long run.
Final Tips
Keeping your leather football gear in top condition requires more than a one-time deep clean. Here’s how to make sure your maintenance routine stays safe and effective over the long haul:
Handle With Care
Avoid shortcuts that could damage your gear.
Never machine wash leather. The agitation, heat, and water saturation can severely damage the material.
Do not fully submerge leather gear in water. Moisture can break down the leather fibers and cause cracking or warping.
Always Spot-Test First
Before applying any product across the full surface:
Use a hidden or less visible area of the gear to test new soaps or conditioners.
Wait several minutes to ensure there’s no discoloration or adverse reaction.
Set a Consistent Cleaning Routine
Leather gear performs best with regular attention—not just emergency cleanups.
Clean and condition gear every few weeks during active use.
Post-game wipe-downs help minimize buildup and extend gear lifespan.
Store gear properly between uses to prevent premature wear.
By making these steps a regular habit, you’ll ensure your leather gear remains game-ready and resilient season after season.
Step 1: Gather the Right Supplies
Before you touch your leather gear, get your tools in order. You don’t need anything fancy—just the right basics to avoid ruining the material. Grab a soft-bristled brush or a microfiber cloth. These are gentle enough to lift dirt without scratching the surface.
Next, pick a mild soap that doesn’t contain harsh detergents, or better yet, go with a dedicated leather cleaner. Harsh chemicals can dry leather out fast. Mix it with distilled water—tap water has minerals that can stain over time.
You’ll also need a good leather conditioner. This restores moisture and keeps the leather flexible. Finally, have a few clean, dry towels on hand for wiping, drying, and buffing. Don’t skip this prep step—it saves you frustration later and sets you up for a proper clean.
Step 2: Pre-Cleaning Prep
Before you hit your gear with any soap or moisture, start with the basics. Take a clean, dry microfiber cloth or a soft-bristled brush and go over every inch of the leather. You’re just trying to knock off loose surface dirt, dried mud, turf bits—whatever the game left behind. Do this gently. No scrubbing. Let the brush do the work.
Next, give your gear a proper visual once-over. Look closely for cracks, discoloration, mold, or deep-set stains. These issues need to be spotted early before you apply any sort of cleaner, or you risk setting them in deeper or making them worse. If something looks off, make a note so you can treat it specifically during the deep clean. This step isn’t glamorous, but skipping it can cost you a pair of gloves—or worse.
Step 3: Deep Cleaning Your Leather Gear
Start by mixing a small amount of gentle soap—something non-detergent—with distilled water. You’re not aiming for suds, just enough to break down dirt and sweat without stripping the leather. Avoid tap water since minerals can leave marks.
Take a clean cloth, dampen it lightly in the solution, and begin wiping the leather. Key word: dampen. The cloth should never be dripping. Excess moisture warps leather and weakens stitching.
Wipe the surface using firm but moderate pressure. Focus on trouble spots, but don’t scrub like you’re cleaning a cast iron pan. Your goal is to lift grime while respecting the material. If it’s been a while since your last clean, take your time here.
Looking for more technique? Check out this detailed walk-through: Cleaning Leather Gear.
Step 4: Drying and Conditioning
Once you’ve finished cleaning, pat the leather dry with a clean towel. Don’t rub—just press gently to lift moisture without driving it deeper into the material. After that, let the gear air-dry naturally indoors. No hair dryers, no heaters, and definitely no direct sunlight. Heat can warp leather, crack it, or make it stiff.
Once fully dry (this can take several hours), it’s time to condition. Leather conditioner keeps the surface supple and prevents it from drying out or breaking down. Apply it with a soft cloth, working it in small circular motions. Let it sit as directed—usually 10 to 20 minutes—then wipe off any excess with a clean cloth. Buff gently to finish. Well-maintained leather should be soft, flexible, and lightly sheen—not greasy or sticky.
Step 5: Odor Control & Maintenance
Don’t wait for the smell to hit you in the face—clean your leather gear after every game. It’s easier to do a quick wipe-down regularly than a deep salvage job after months of sweat buildup. Letting grime pile up only shortens the life of your gear.
After cleaning, always air it out. Moisture and darkness turn gear into a bacteria factory. Hang pieces in a dry, well-ventilated spot—never toss them straight into a closed locker or sealed bag.
Storage matters, too. Keep leather gear in a space that breathes. No damp basements, no stuffy backseats. A dry room with air circulation keeps your gear conditioned between uses.
If things get funky, don’t panic. We’ve broken down the best tactics in our guide, Removing Gear Odor. It covers how to handle stink without trashing your gear.
Conclusion
Leather gear isn’t cheap—and neither is losing performance because it wasn’t maintained. Regular cleaning isn’t just about looking good under the lights. Dirt, sweat, and moisture wear leather down fast, cracking it, weakening structure, and shortening its lifespan. Take ten minutes now, save yourself replacement costs later.
Make cleaning part of your post-game routine. Air it out. Wipe it down. Condition it every few weeks. The gear you rely on deserves more than a toss into the back of the locker. You show up for the game—show up for your gear too. Treat it right, and it’ll deliver when it counts.
 Chris Franconso is a distinguished contributor at Awesome Football Network, where he plays a pivotal role in delivering high-quality football content. With a deep-seated passion for the sport and extensive knowledge, Chris provides readers with thorough match previews, insightful tactical analyses, and detailed player assessments. His writing is marked by its clarity and depth, offering a comprehensive understanding of the game that caters to both casual fans and dedicated professionals.
Chris’s expertise extends beyond just reporting; he brings a nuanced perspective to football journalism that enhances the reader's experience. His commitment to presenting accurate and engaging content helps Awesome Football Network maintain its reputation as a leading source for football news and analysis. Through his work, Chris contributes to the platform’s mission of enriching the football community with relevant and timely information.
Chris Franconso is a distinguished contributor at Awesome Football Network, where he plays a pivotal role in delivering high-quality football content. With a deep-seated passion for the sport and extensive knowledge, Chris provides readers with thorough match previews, insightful tactical analyses, and detailed player assessments. His writing is marked by its clarity and depth, offering a comprehensive understanding of the game that caters to both casual fans and dedicated professionals.
Chris’s expertise extends beyond just reporting; he brings a nuanced perspective to football journalism that enhances the reader's experience. His commitment to presenting accurate and engaging content helps Awesome Football Network maintain its reputation as a leading source for football news and analysis. Through his work, Chris contributes to the platform’s mission of enriching the football community with relevant and timely information.